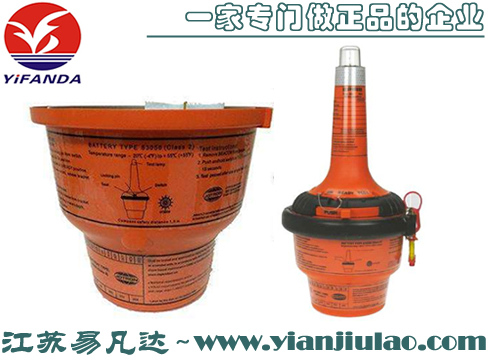
型号:83056
规格:14.4V/13500mAh
用途:用于挪威TRON 40S MKII应急无线电
示位标

REPLACING THE BATTERY MODULE
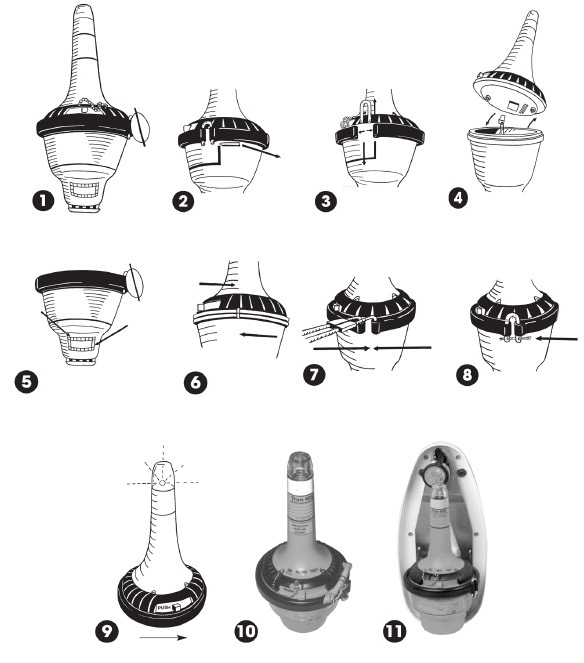
To change the battery, the lower Tron 40S assembly is replaced with a new one.The battery module consists of the complete lower half of the Tron 40GPS and is to be replaced every 5. year.The marking on the battery module show the expiry date. A new battery comes complete and is easily replaced by opening the equator ring between the top and bottom of the EPIRB.The battery must be replaced if the EPIRB is activated for any purpose other than test.
Replacing the battery module should be done by skilled technicians only - preferable by a JOTRON agent.Your closest JOTRON agent with TronSTAT facilities has been specially trained to perform the necessary operation and is also able to do an extended test of the EPIRB, ensuring that the EPIRB operates within the specifications.
1. Remove the EPIRB from its bracket .
2. Remove the equator ring by pressing it out from the housing.
3. Separate the two halves of the EPIRB housing.
4. Unplug the 6 pin connector that comes from the lower EPIRB housing.
5. Control that the new battery module is marked with p/n 97780 and has a new expi ration date approximately 5 years from purchase.
6. Fit a new gasket on top of the battery module and reconnect the 6 pin connector, besure that the connector is fitted properly. A noticeable «click» should be heard when the connector is in place.
7. Please make sure that the enclosed silicagel bag is fastened inside the emergency product, with the supplied strips into/between holes in the black cover.
IMPORTANT: Cut the strips X-96898 after mounting of silicagel to avoid the strips
to come between rubber gasket and top housing.
8. Please also fit the enclosed anti corrosion adhesive tape to the inside the battery
before assembly of the unit.
9. Orientate the two halves of the EPIRB the following way:
An orientation tab is fitted on both halves of the EPIRB,These tabs must be placed
carefully on top of each other.
10. Make sure that the gasket is properly in place, and replace the equator ring using
a special tool to tighten it together.
11. Replace the U-shaped bolt and a new split pin to secure the bolt in the equator ring.

